
A well-conditioned and properly laced baseball glove can make all the difference on the field. Whether you're a seasoned player or a newcomer to the game, relacing your glove can not only extend its lifespan, but it can also improve your grip and overall performance. This step-by-step guide will walk you through how to relace a baseball glove like a pro.
1. Gather Your Materials
First, you'll need a few essential tools:
- A new lace or lacing kit: These are typically made from high-quality leather and can be found in most sporting goods stores or online.
- A lacing tool or needle: This is a small, sturdy tool that helps thread the lace through the holes in the glove.
- Leather conditioner: This is used to soften the leather and make it easier to work with.
- A small pair of pliers can be helpful for pulling the lace through tighter sections.
- A pair of scissors for cutting the lace.
2. Study Your Glove
Before you begin, take some time to carefully study how your glove is currently laced. You might find it helpful to take pictures or sketch a diagram. Each glove has its unique lacing pattern, and it's crucial to follow the same pattern when relacing your glove.
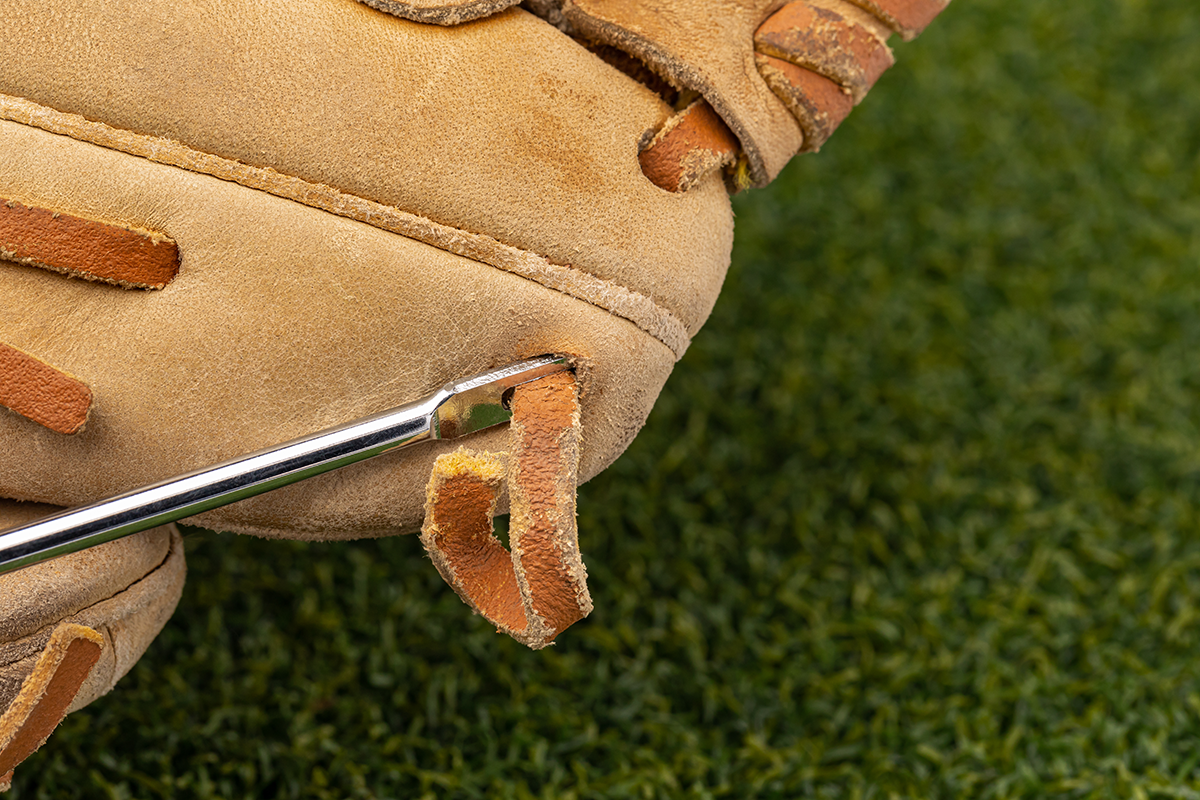
3. Remove the Old Lace
Start by loosening the knots on each end of the lace, then carefully remove the old lace from the glove using the lacing tool or needle. Be careful not to damage the leather in the process.
4. Condition the Glove
Once you've removed the old lace, it's time to condition your glove. Apply a generous amount of leather conditioner to the entire glove, focusing on the holes where the laces pass through. Let the conditioner sit for a few hours or even overnight. This will make the leather softer and easier to work with.
5. Start Relacing
Thread the end of the new lace through the lacing tool or needle. Starting from the top of the glove (where the fingers meet the wrist), begin relacing following the original pattern you studied earlier. Use the pliers to pull the lace tight where necessary.
Ensure that each section of the glove - the fingers, palm, web, thumb, and heel - is laced tightly and evenly. You don't want any loose sections that could affect your grip or the glove's structure.
6. Finishing Up
Once you've threaded the lace through every hole, you should be back at the starting point. Tie off the lace with a secure knot, and cut off any excess with the scissors.
Apply a bit more conditioner to the newly laced areas, and work the glove with your hands to help the new lace settle in. This will also help maintain the glove's shape and flexibility.
7. Break in the Glove
Finally, break in your newly laced glove. This might involve playing catch for a few days or using glove mallets to work the leather. This will help the laces and leather adjust to each other and further improve the glove's performance.
Relacing a baseball glove like a pro is a skill that requires patience, attention to detail, and practice. But with these steps, you'll be on your way to giving your glove a second life and improving your game. Remember, every glove has its unique quirks and characteristics, so always take the time to understand your glove before relacing it.
Just as a well-tuned instrument can make beautiful music, a well-laced glove can make the difference between a good game and a great one. So next time your glove's laces start to wear thin, don't hesitate to give it a fresh lease on life with a new set of laces.